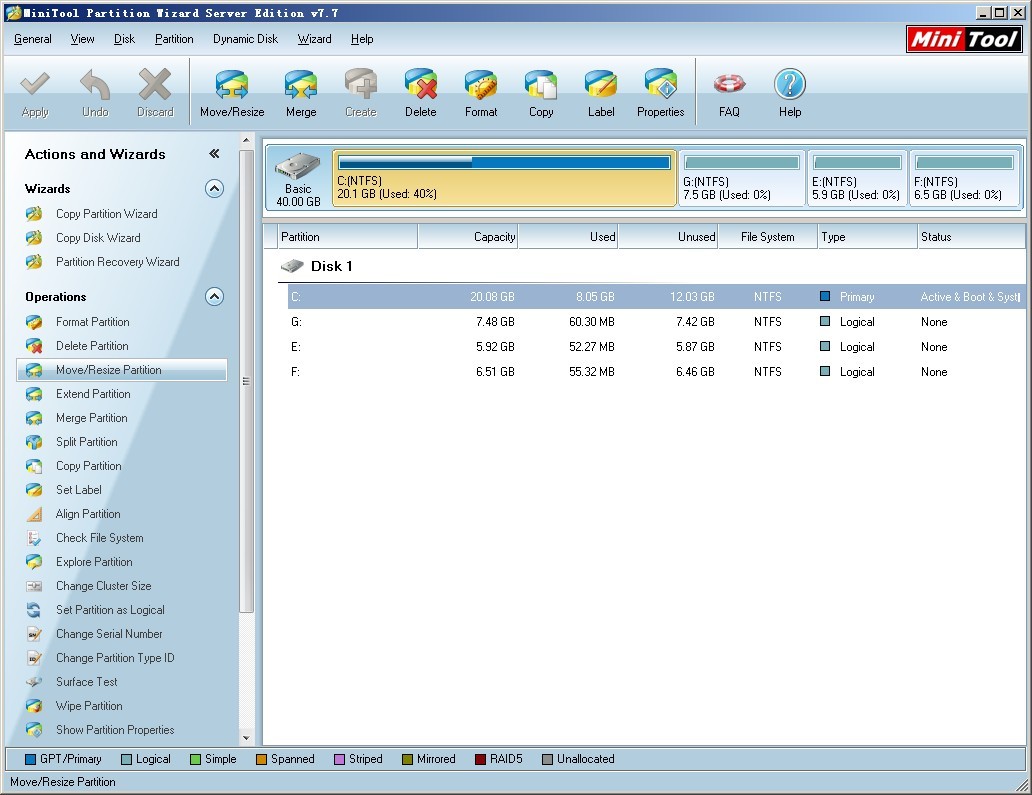
In the process of using Windows Server 2003, we often come across the issue that system partition lacks necessary spare space. This situation will cause serious problems, for example, system slowing down or crashing. The best solution is to extend system partition for Windows Server 2003. But we all know that disk management tool of Windows Server 2003 is unable to resize partition. For users who are proficient at computer technology, they can use command prompt tool to extend system partition. But for those who are not, professional server partition software is a good choice. We can download professional partition magic from http://www.partitionwizard.com/ / and use it to extend server 2003 system partition trustingly. Server partition magic The recommended server partition magic has many prominent features. 1. Powerful functions: we can use it to extend system partition for Windows Server 2003 as well as realize other partition management operations. 2. High security: in the process of extending system partition, partition data will not be influenced, so we can use it to extend system partition for Windows Server 2003 trustingly. 3. Simple operations: even those who have no professional partition management experience can use it to extend system partition for Windows Server 2003 easily by following software prompts. Then we'll show how to use the recommended server partition magic to extend system partition for Windows Server 2003. Extending Server 2003 system partition 1. Launch the server partition magic. Then select system partition and click "Extend Partition" function, as follows. 2. Select a partition from the drop-down list to get free space to extend system partition and then drag the button below to resize partitions. After that, click "OK" to go back to the main interface, as follows.
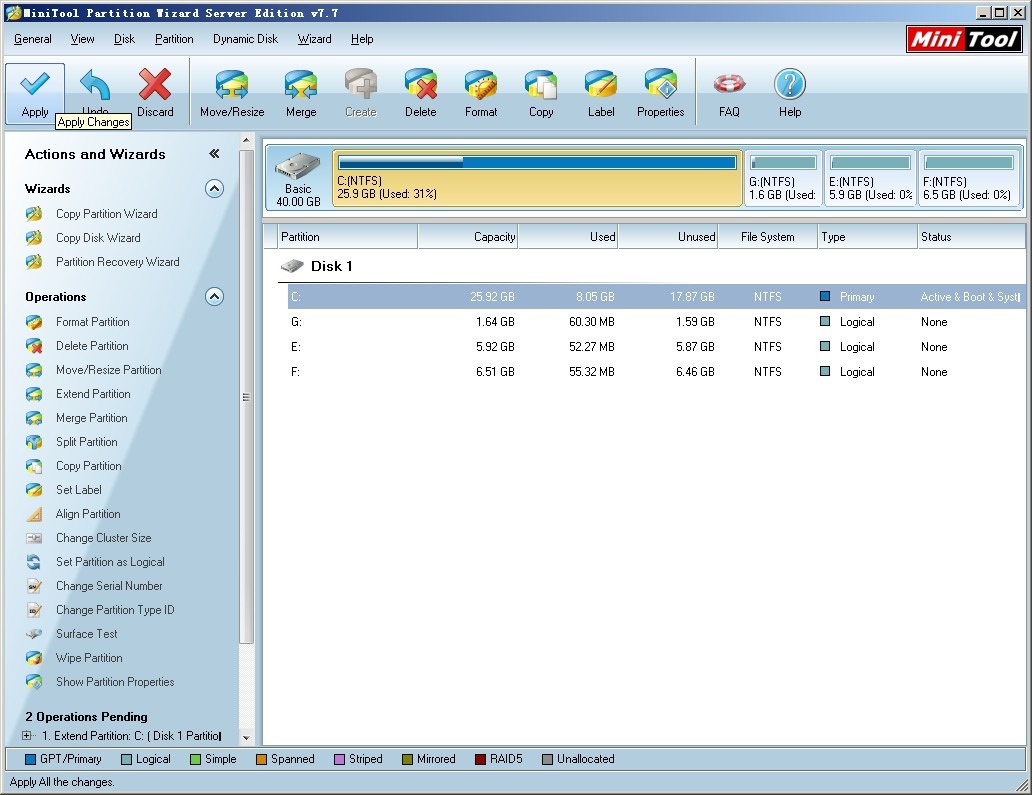
3. We can see from the main interface that system partition is extended. Click "Apply" to execute the operation, as follows.
Users can also use this server partition magic to manage partitions in other situations. For more information, please visit its official website.
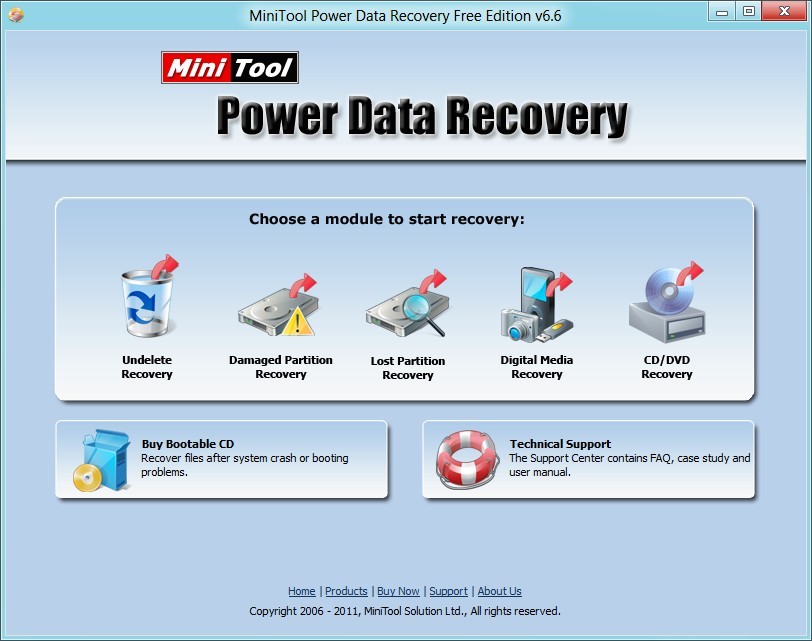
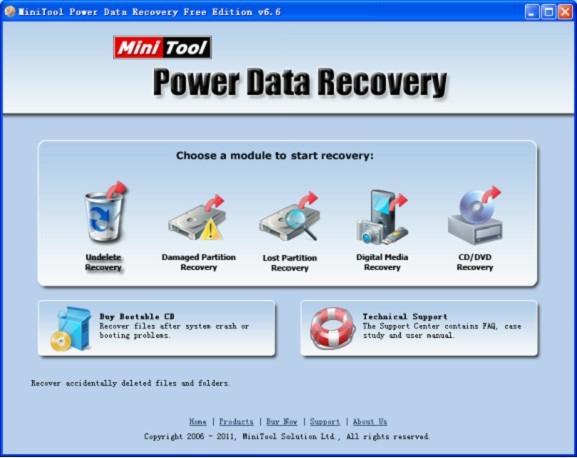
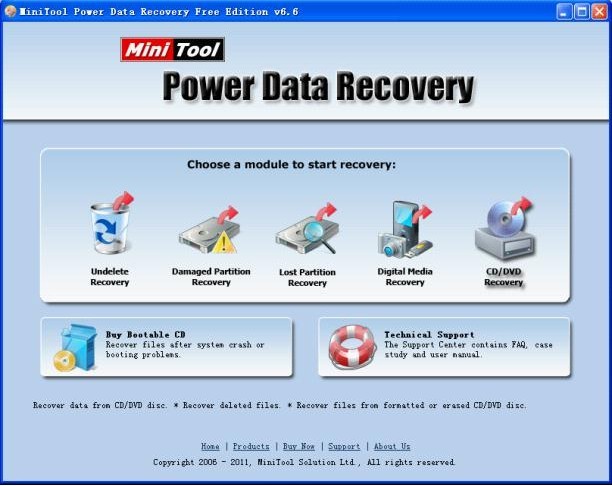
Like in the other Windows operating systems, file loss problems on Windows 8 are pesky for users. If the problems are caused by soft faults, it is unnecessary to resort to professional data recovery companies, which will cost much money and make users risk information leak threats. But users should pay attention. Windows 8 is the latest operating system of Microsoft, so it is possible that many apps are not compatible, including file recovery software. So when choosing data recovery software for Windows 8, users should attach particular importance to software compatibility. Or the incompatible file recovery software may result in more data loss problems. For the sake of data security and convenience, users could visit http://www.powerdatarecovery.com/ to download the free file recovery software to carry out Windows 8 file recovery. Free file recovery software The above is the starting interface of the free file recovery software. Repeated tests show that it is well compatible with all common Windows operating systems including Windows 8, Windows 7, Windows Vista and Windows XP. Five data recovery modules are able to recover lost files in many different situations. Nearly almost all data loss problems caused by soft faults can be solved easily. For example,
"Undelete Recovery" is able to recover deleted files quickly.
"Damaged Partition Recovery" can recover files from formatted and logically damaged partition. For instance, if a partition becomes inaccessible because of viruses or logical error, users can use this module to recover files from this partition.
"Lost Partition Recovery" is capable of recovering files from lost and deleted partition.
"Digital Media Recovery" is able to realize photo recovery, music file recovery and video recovery.
"CD/DVD Recovery" can recover lost files from CD and DVD.
All operations are very simple. Take photo recovery for example.
Photo recovery on Windows 8
1. Please click "Digital Media Recovery" in the starting interface.
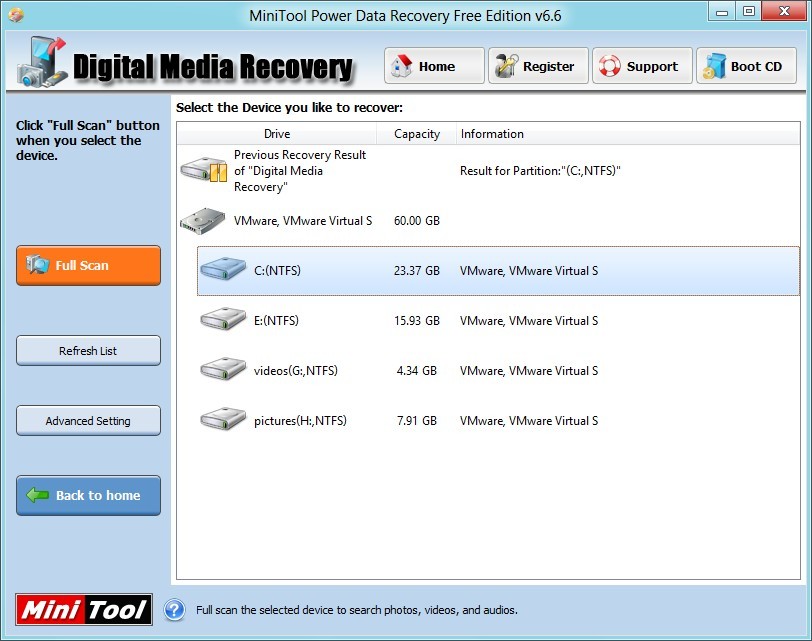
2. Select the partition where the lost photos were stored and click "Full Scan", as follows.
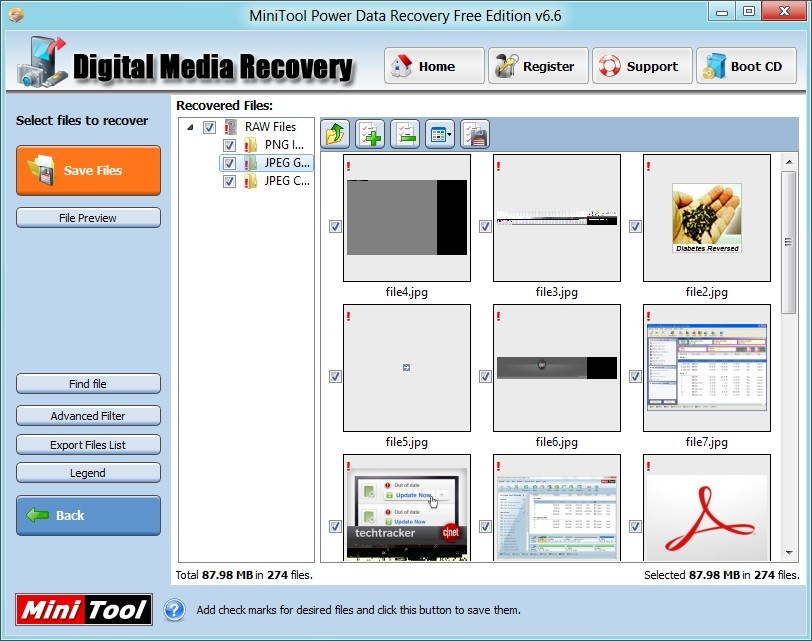
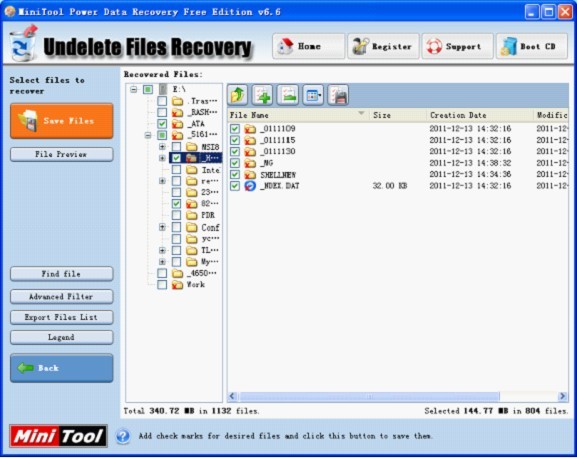
3. Find and check the files to be recovered and click "Save Files", as follows.
After the checked files are stored to a safe location, Windows 8 photo recovery will be accomplished. Operations of the other modules are also so simple. If users want to get detailed procedures, please visit the official website.
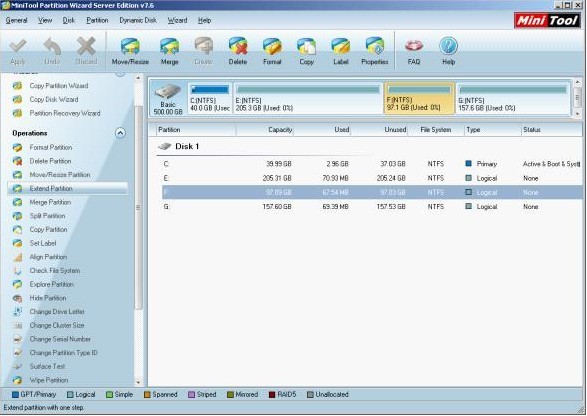
If users want to keep Windows Server 2003 run better, server partition management is a piece of requisite work. Server partition management contains so many operations among which Server 2003 partition resizing is quite commonly seen. That is because resizing partition influences server running speed, data storage, disk space use ratio, and other aspects to a large extent. As is well known, every Windows operating system offers a built-in disk management tool, and Server 2003 is not an exception. But disappointingly, this tool is unable to resize partition of Server 2003 since it does not have the function of resizing partition. Well, how can users accomplish Server 2003 partition resizing well? Actually, as long as users own an excellent server partition manager, resizing partition of Server 2003 is a piece of quite simple work. However, the point is that it is difficult to find reliable and powerful server partition manager. On the software market, most server partition managers have defects. If users resize partition of Server 2003 by using this kind of software, data loss or partition damage may emerge. To help users find server partition manager which has high security, wide compatibility, powerful functions, and great operability, we recommend a professional downloading website http://www.partitionwizard.com/ Next, let’s use this server partition manager to perform Server 2003 partition resizing. Resize partition of Server 2003 by using server partition manager After opening the server partition manager, we can see its main interface, like the following screenshot shows: From the main interface, we can see this server partition manager provides users with 4 solutions to resizing partition of Server 2003, namely move/resize partition, extend partition, split partition, and merge partitions. To perform Server 2003 partition resizing, users only need to select the partition which needs resizing and click corresponding function, and then operate according to prompts.
At last, click “Apply” button to perform all pending operations to computer. After this operation, Server 2003 partition resizing is finished completely and successfully.
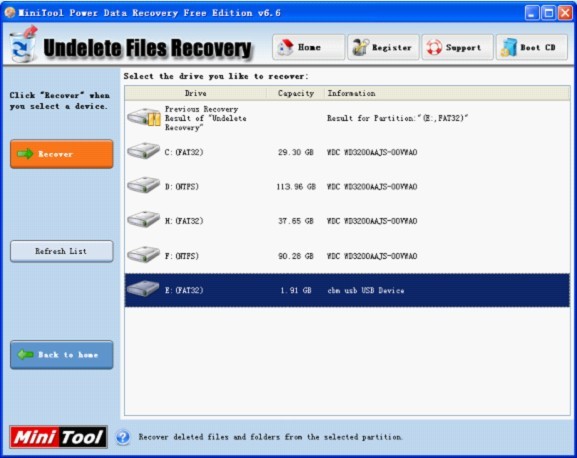
Nowadays, U disk is one of most widely used external storage devices, which results from advantages of U disk. Main advantages of U disk are as follows: 1. Easy to take and convenient to use. 2. It is so cheap that almost all users can afford it. 3. Good for updating information, 4. East to keep. It is believed that the above 4 advantages are enough to make U disk popular. Nevertheless, U disk users are often troubled by many problems, too. For example, important files stored on U disk are deleted by mistake; virus often deletes important files since U disk is used among different computers frequently. After important files are deleted mistakenly, it is believed that all users want to accomplish deleted U disk file recovery. Considering costs and privacy, most users give up resorting to professional data recovery companies. Therefore, file recovery software becomes their only choice. However, most file recovery software on the current software market only supports file recovery from hard disk. That is to say users have to find and download a piece of U disk file recovery software. Searching on the internet, we will find there is so little U disk file recovery software. In addition, some even has functional defects. If we use inferior U disk file recovery software to recover deleted files from U disk, deleted files may disappear forever. Well then, how can we download excellent U disk file recovery software? Now, a professional downloading website namely http://www.powerdatarecovery.com/ is introduced. U disk file recovery software downloaded from this website not only can recover deleted files from U disk but can ensure file security. Detailed steps will be given next. Recover deleted files from U disk by using U disk file recovery software Firstly, download and install the U disk file recovery software to computer, and then connect U disk to computer. Next, run software to open the main interface: Then, select the functional module which is specially designed for deleted file recovery from the 5 modules. After this operation, the following interface will appear:
Next, select the partition representing U disk and click “Recover” button to scan this U disk. After scan, the following interface will emerge:
Now, we can see all deleted files on the U disk. We check all files needing to be recovered and click “Save Files” button to set save path. Then, deleted U disk file recovery is finished successfully by this U disk file recovery software.
The above demonstration shows it is so easy to recover deleted files from U disk. Therefore, when users need to perform deleted U disk file recovery, hurry to download this U disk file recovery software.
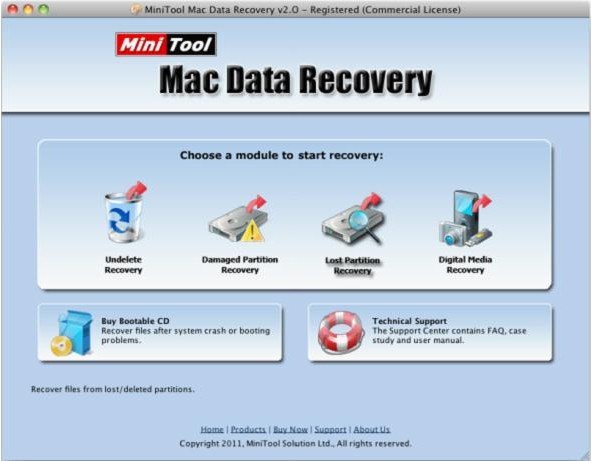
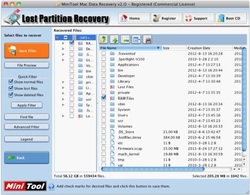
Nowadays, Mac becomes more and more popular. Correspondingly, Mac file loss emerges more and more frequently. Therefore, Mac file recovery becomes a hot topic among numerous Mac users. In general, there are 2 solutions to Mac file recovery, namely turning to data recovery companies and using file recovery software. As known to all, data recovery companies charge so high data recovery fees that common Mac users can not afford them. So, using file recovery software is the most widely used method for Mac file recovery. Since file recovery software developed for Windows can not be compatible with Mac OS most of the time, users should download professional Mac file recovery software. It is believed that most Mac users are willing to download professional Mac file recovery software. On the current software market, there is indeed professional Mac file recovery software, but most of them have functional defects. If Mac users want to download professional Mac file recovery software which has powerful functions, high security, wide compatibility, and great operability, they had better visit professional downloading website like http://www.mac-data-recover.com., MIniTool Mac Data Recovery. This professional Mac file recovery software supports all popular Mac operating systems as well as file systems. In addition, it can recover files lost due to almost all logical errors. In the process of professional Mac file recovery, theMac file recovery software will not bring any damage to original data. Furthermore, operations are so simple. If users have doubts about operability of this software, please look at the following demonstration. Recover lost files by using professional Mac file recovery software Detailed steps are as follows: 1. Download and install the Mac file recovery software to computer. 2. Open the software to get its main interface: 3. Select a suitable functional module to perform free Mac file recovery (detailed functional information will appear below after we move mouse pointer to a certain module). Here, we take lost partition file recovery for example, so we need to click the functional module specially designed to recover lost files from lost partition.
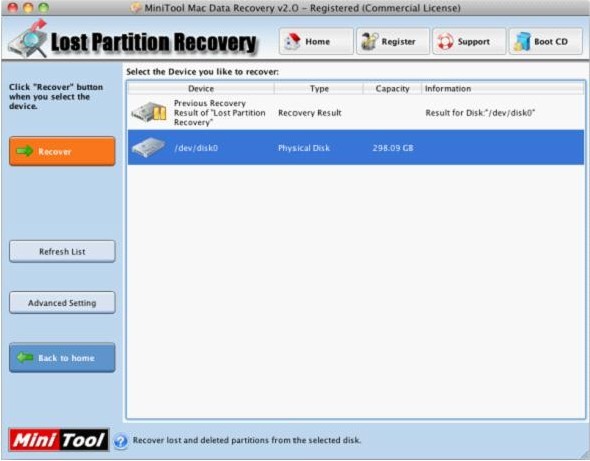
4. Select the disk where partition loss happens and click “Recover” button.
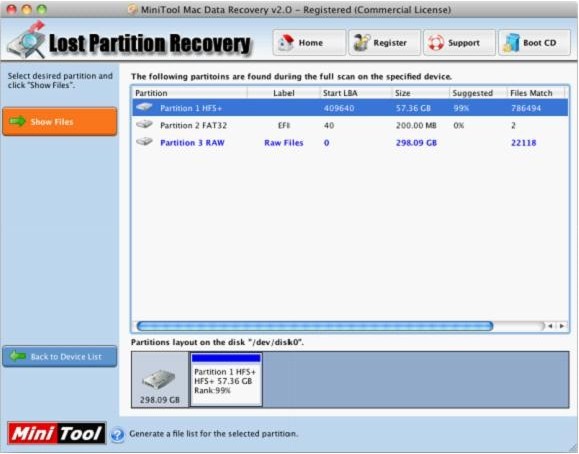
4. Select the partition which is most similar with lost partition and click “Show Files” button to get the next interface:
6. Check files needing to be recovered and click “Save Files” button to appoint a save path for recovered files.
After that, free lost partition file recovery is finished by using the free Mac file recovery software. If users want to get more information about this free Mac file recovery software, welcome to its official website.
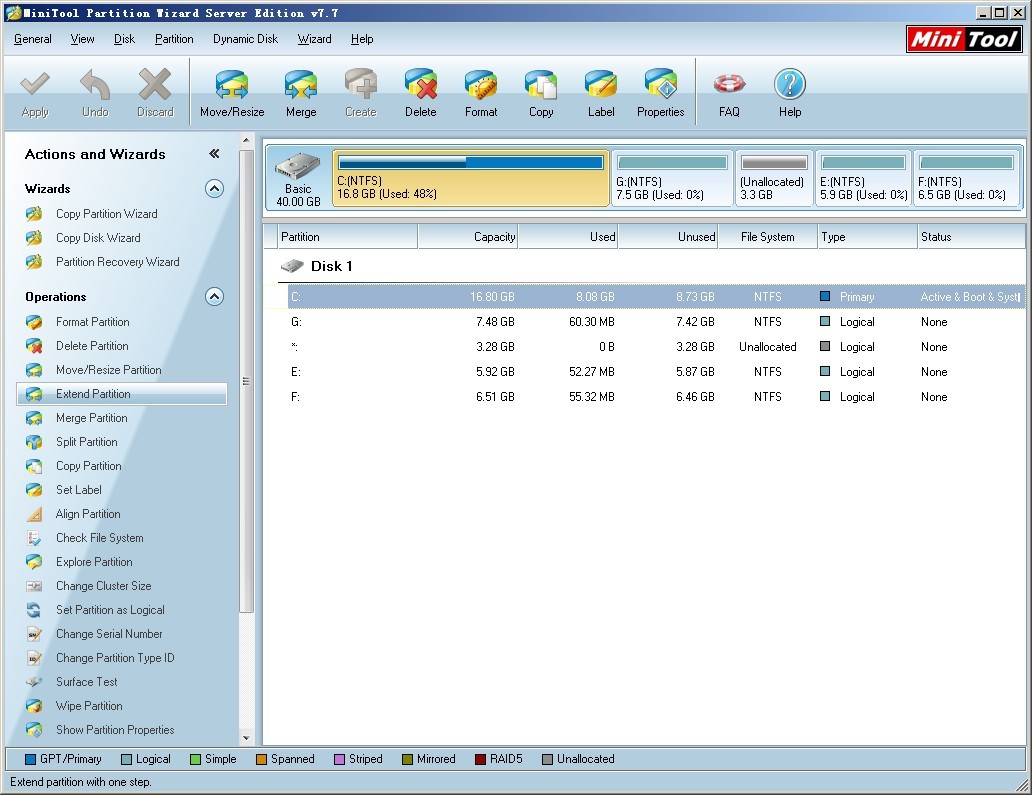
How to extend system partition for Server 2008 quickly and safely? Users may think of using Windows disk management tool because the tool of Windows Server 2008 is equipped with "Extend Volume" function. Actually, if there is unallocated space next to system partition, we can use this function to extend Server 2008 system partition. But most of the time this condition is not met. Sometimes, there is no unallocated space, or even if there is, it is not next to system partition. Seen from this, Windows Server 2008 disk management tool is not reliable. Actually, we can use another way to extend system partition for Server 2008. Professional server partition magic is a good solution. Users can download it from http://www.partitionwizard.com/. Extending Server 2008 system partition with professional server partition magic After downloading the recommended partition magic to the computer, install it. Then launch it and we'll see its main interface, as follows. Select system partition and click "Extend Partition" function. We'll see the following interface.
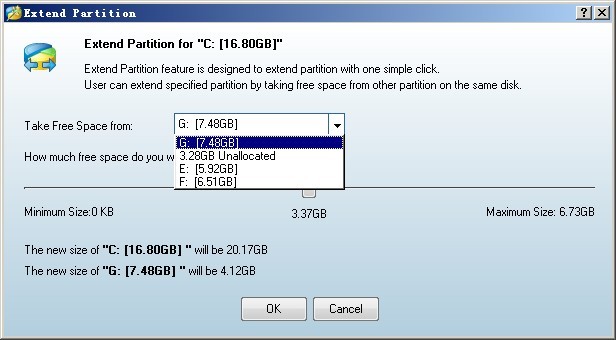
We can directly take free space from any one partition listed in the drop-down list. Also we can select unallocated space. Here, we'll take free space from Partition G:. Select it and then drag the button below to resize partitions and partition sizes will change accordingly below. After that, click "OK" to go back to the main interface.
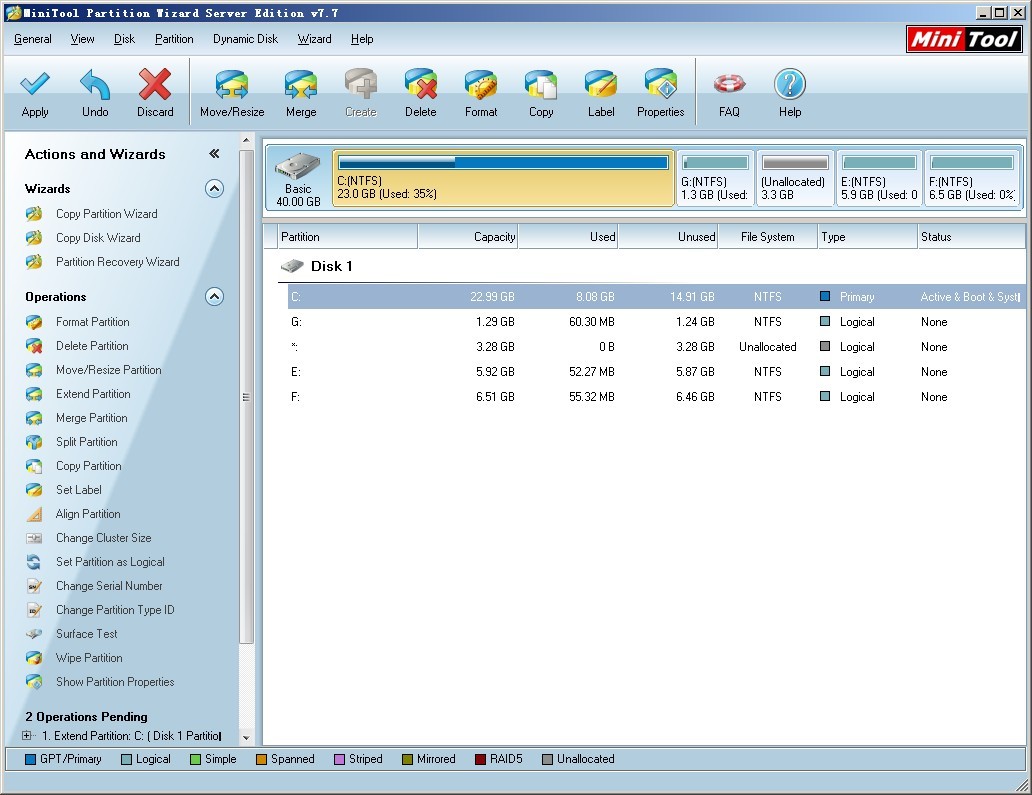
From the main interface we can see system partition is extended and Partition G: is shrunk accordingly. This is only a preview. We should click "Apply" button to execute the operation, finishing extending system partition for Server 2008 in real sense.
CD and DVD are 2 commonly used storage devices in Windows platform, and users often store important but not commonly used files to CD or DVD. If file loss emerges on CD/DVD, file recovery will become quite difficult, because only little file recovery software supports CD/DVD file recovery. Of course, users can ask professional data recovery companies for help, but most users are unwilling to adopt this method, because some of them can not afford high data recovery fees and some fear of privacy leakage. Well then, what is the best method for CD/DVD file recovery? The best way to accomplish CD/DVD file recovery Using CD/DVD file recovery software is undoubtedly the best way to accomplish CD/DVD file recovery. Reasons are as follows: 1. CD/DVD file recovery software is cheap or even free. 2. Can recover lost files from CD/DVD easily and safely. 3. Bring no damage to lost data. 4. Can meet almost all demands for CD/DVD file recovery. Now, let’s use the CD/DVD file recovery software to recover lost files from CD/DVD. Step 1: Download the CD/DVD file recovery software-MiniTool Power Data Recovery, to Windows computer from http://www.powerdatarecovery.com Step 2: put CD/DVD to CD driver and launch the CD/DVD file recovery software: Here, we can see 5 different file recovery modules. Among them, “CD/DVD Recovery” is specially designed to recover lost files from CD/DVD.
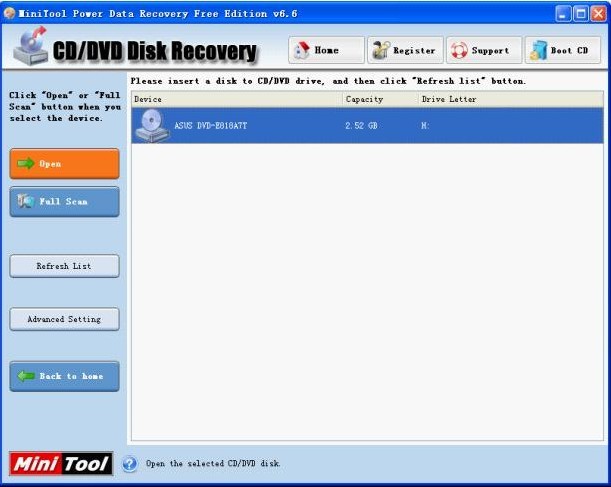
Step 3: click the module “CD/DVD Recovery” to enter the next interface:
Step 4: select the CD/DVD where file recovery will be performed and click “Open” button to get the following interface:
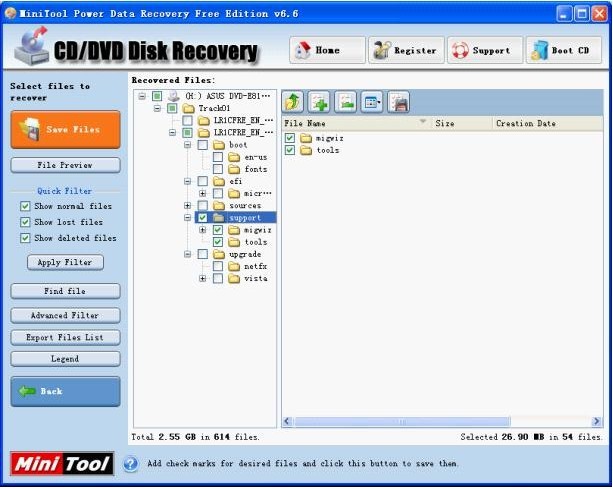
At last, check files needing to be recovered and click “Save File” button to appoint a safe place to save recovered files. After that, CD/DVD file recovery is finished successfully.
Now, every computer user should know how to recover lost files from CD/DVD with CD/DVD file recovery software.
|

 RSS Feed